February 27, 2012

Making Up Is Hard To Do: A Look & Some Highlights


Practice sesh #2 was with another good friend of mine. I hadn't seen Pat in a while, so I asked if I could do her makeup and I'm glad she said yes!

Like with Missy, I was originally going to do a daytime look; but Pat asked for something smoky instead, so of course, I obliged. She offered to bring some of the eyeshadows she owns, including the original Sleek MakeUP palette, and I agreed as I wanted to have a wider range of shades to choose from. The teal and navy eyeshadows sucked me in, so I ended up using those. I'm so glad I went with blues, because they made her hazel eyes really pop.

I was slightly disappointed that I didn't have to mix any shades for her because I would really like more practice on that, but it definitely made life a bit easier. From this session, the two things I need to work on are concealing dark under eye circles and lining brows. Though, in my defense, we haven't covered brows in class yet, so this was my sad attempt at filling someone else's in. As for concealing, I always find that my initial mixing of shades makes the under eye circles look kind of ashy.


Products Used:
Make Up For Ever Face & Body Foundation - 
Make Up For Ever 5 Camouflage Cream Palette - Shade 5 (Professional Corrective Shades)
Make Up For Ever Sculpting Kit
MAC Blush - Pinch O'Peach

Make Up For Ever HD Microfinish Powder
MAC Mineralize Skinfinish - Soft & Gentle

Sleek MakeUP i-Divine Palette - Original 
Make Up For Ever Eyeshadow - Black 4
Make Up For Ever Aqua Eyes  Eyeliner - Matte Black 0L
Maybelline Great Lash Waterproof Mascara - Very Black

Make Up For Ever Lip Pencil - No. 51
Burberry Lip Mist - Camelia Pink


Hope you guys like this look! I'm really happy with how this turned out and I'm starting to feel a little bit more comfortable in my own skills. Huzzah!


Makeup Artistry Fundamentals Thoughts...


  • I am now six classes into my course and there are only four more classes left. Right now, we're focusing on day looks, (which is why I always mention how I initially wanted to do a day look, but ended up doing an evening one instead :p). Ah well, might as well get a head start on the next course, no? :p
  • Last week's class was the best I've had so far, in terms of the actual practical aspect. I paired up with a classmate that had acne, so it took me a lot longer to do her base, especially since I was using Face & Body; but I got there... And it looked really good, actually. I forgot to bring my camera, so you're just gonna have to take my word for it :p. But her skin looked quite flawless and I was incredibly proud of myself. I really liked the finished look, too, and so did my instructor. I've been doubting myself this month, but after seeing the final look, I truly felt like I could do this for a living.
  • I definitely want to get different foundations. I mean, Face & Body is great for people with good skin. But for my classmate with acne, I must've applied more than 5 layers on her face. Why bother with that many layers when you can get a more pigmented foundation and just apply 1-2? I think our kit would be better if they added an extra HD foundation and took out a Face & Body.
  • I get that this is just the fundamentals course, but I wish I could get more feedback from my instructor. I always try to preempt him by stating all the things I think I could've done better, but he just goes, "no, that's good. Great job." Then he walks away... Haha!
  • Washing your brushes every week is kind of a pain. I know I should've been washing it every week for personal use anyway, but I'm lazy, yo!


Happy Monday, lovelies!


February 24, 2012

Dear Marcelle BB Cream, You Should Let Me Love You...


Let me be the one to, give you everything you want and need... Oh man, throwback to my teenage years!

Anyhoo, on to the task at hand... Let's talk about BB Creams, shall we? I must say, I really like the idea of it. Skincare benefits and coverage? Sign me up, yo!

When I went to the Philippines a few months ago, I purchased four BB Creams, but only one really made the cut. Thankfully, it was the one I bought a full size bottle of :p. Then when I came back, the beauty world's collective hearts were aflutter because North American brands have jumped on the BB Cream bandwagon and were releasing their own. To date, I believe Garnier, Vichy, EsteƩ Lauder, Clinique, Smashbox, Too Faced, and Boscia all have come out with their own BB Creams.

Which leaves a beauty blogger to beg the question: "which shall I choose?"

Now this is one of the reasons I love beauty blogging so much. You end up getting to know, and even making friends with other bloggers; and when your friends say they loved Marcelle's BB Cream, you better believe I'll be picking up a tube for myself :p.


A blurb from Marcelle:

The 8 in 1 multi-benefits BB Cream that does it all for you, instantly!


Your ultimate skin care enhancer for all ages and skin types, this multi-purpose skin care cream is more than a tinted moisturizer or simple make-up base. It perfects the skin to reveal a more even epidermis and well-hydrated, flawless complexion, all in one. Use it alone as a tinted moisturizer, over your moisturizer to unify your complexion and reduce the appearance of blemishes, or apply as a make-up base under foundation for total coverage and improved stay-on power. BB Cream is offered in two shades and is suitable for a wide variety of complexions thanks to its self-adjusting pigments that transform and adapt to skin tone.


Hypo-allergenic and perfume free. Suitable for all ages and skin types. 

I purchased the shade Light-Medium, and it's a pretty good match for my skin. The first thing I noticed was that it gives pretty good coverage. The main reason I'm not fond of tinted moisturizers is because there isn't enough coverage for someone like me who doesn't have evenly pigmented skin. Obviously, a BB Cream isn't going to make my skin look perfect, but it does make my skin look much better!


Here's my (rather frightening) face, pre-concealing. As you can see, there's still areas around my mouth, along my chin and definitely under my eyes that need a lot of help, but the rest of my skin looks luminous and healthy. 

If you have combination or oily skin, note that you will need to blot and possibly re-touch throughout your day. I also tried layering this underneath a foundation (MAC Pro Longwear), which Marcelle suggests, and I did find that it made my foundation look a little bit better. However, because it's not that suitable for oilier skin, I found that I had to blot after a mere 4 hours. That said, I was standing onstage under hot lights, so that was probably the culprit.

So if you're on the market for something that will give your skin a boost and make it look naturally lovely without necessarily adding a lot of coverage, then pick this baby up! I find that Marcelle's BB Cream works just as well as the best BB Cream I've tried from the Asian market, so I'm very happy that this product is a mere 2 blocks away whenever I need to get a new tube. 

I love that it makes my skin look pretty darn good without looking like I'm wearing any foundation. It looks so natural on that it really does seem like you have amazing skin. And for someone who doesn't have amazing skin, $23 is a small price to pay for a tube of Marcelle BB Cream!


Last thing...


I don't know who this model is, but Maybelline has been using her photo for their Tumblr posts during NYFW. 

All I can say is: BROOOWS! Aren't they gorgeous? Not sure I could pull that off, but I've been feeling a strong urge to let my my eyebrows grow a little bit thicker...


Happy weekend, lovelies!
Let me know if you've tried this BB Cream & how you're liking it so far. =)


February 20, 2012

Said You Wanna Be Startin' Somethin'...


For the third installment of the Lipstick Bandit posts, we bring to you STARTER LIPSTICKS!

Being a performer, lipstick has pretty much been a part of my life since I was a child. Seriously, I've been wearing lipstick since I was probably 9 or 10 years old. Since I couldn't really remember which lipstick "started it all" for me, so to speak, I decided to write a post about a lipstick that would be a great "gateway" product for any lipstick newbies out there.

Generally, when I'm thinking of trying a makeup product for the first time, I have two guidelines: Choose a wearable shade and, if possible, test a drugstore version first.

I know drugstore products are not as luxurious or glamorous as their high-end counterparts, but you can't deny that brands are really stepping up their game in these past few years. Thus, I bring you today, Maybelline's Color Sensational Lipcolor in Warm Me Up.


(Forgive the grossness of the lipstick. I had a photo of an unused one but it was in my previous laptop) 


I have a few Color Sensational lipsticks in my "collection," if you will, and they're definitely one of my favourite drugstore lipsticks. As with the other shades I own, Warm Me Up applies really smoothly and has a creamy texture. It's not moisturizing, but it's not drying at all. 

These lipsticks are also very pigmented, and if you know me, you know I like 'em pigmented.

I get a regular amount of wear time with this lipstick, but what I really appreciate is that it fades in a subtle way. Unlike other lipsticks that look horrendous once you've taken a sip or a bite of anything, these babies will just softly fade away so you don't look ridiculous.


Warm Me Up is  a lovely pinkish-nude shade (think MAC Jubilee, only pinker) that is definitely MLBB material for me. I feel that if you're easing your way into using a certain product, it's important to choose a shade that you can wear constantly. Warm Me Up is perfect for that because it's completely wearable and I imagine it would look gorgeous with a lot of different skin tones.

So now here's the best part... You, dear reader, get to check out the other Lipstick Bandit's posts!


Have a great week, lovelies!


February 18, 2012

Rouge In Love Lipsticks - A Blitz Review + Swatches


PROS

  • Lightweight texture
  • Comfortable to wear
  • Very light scent
  • Large shade selection
  • Simple, classy, sturdy packaging
  • Very easy to work with


CONS

  • Not very moisturizing. For those with very dry lips (i.e. ME), make sure to wear a lip balm first.
  • Lighter shades are unforgiving towards dry flakes. Though I find this is true for all lipsticks and not just these particular ones.


Each Rouge in Love lipstick was purchased for $30 ($25 USD / £21 GBP).

For an in-depth review, click here.


Have an awesome weekend, lovelies!


February 13, 2012

Get My Nails Did...


For someone who professes to not use a lot of nail polish, I seem to have acquired a fair amount in the last 2 months... I generally don't like to spend too much on nail polish. Since I don't paint my nails that often, I can't really justify a Dior or Chanel purchase. So most of what's in my "collection," if you can even call it that, is drugstore fare.

Before I start, can I just say that there's nothing like zooming into your cuticles to make you realize how much you've been neglecting them? I actually cringed a few times! I definitely need to start using my Burt's Bees Cuticle Cream again.

So, yeah... Let's not pay any mind to them, shall we?

Anyway, these five shades have really caught my eye, so I thought I would share it with you all!


Elegant, indeed!

There's something so classy about nude nails and I've decided to finally jump the bandwagon. I've seen some nude + insert-colour-here combinations online that are so gorgeous; alas, I just don't have the coordination or the patience to do them myself. I did buy an Art Deco nail polish in black though, because I think this would look super cute with a black stripe on the edge.


I luuurve this green! It's definitely a very earthy, slightly ashy shade, and it's absolutely gorgeous! There's also a tiny hint of shimmer in it, which makes for a really lovely sheen.

The formula's very creamy and a bit thick, so it doesn't require a lot of coats to achieve opacity. In fact, you kind of have to be a bit careful, or it'll end up applying a bit goopy on the nails.

Love the brush on this one, though! It's thicker than other Revlon nail polishes and is quite similar to Rimmel brush heads. If you have rather wide nail beds, like me, having a thicker brush definitely saves time.


I'm not usually into blue nail polish, unless it's a deep navy. But I fell in love with this one from OPI's Nicki Minaj collection because I'm kind of a sucker for teal. It's pulling more blue in the photos, but it actually looks more teal in real life.

This nail polish applies kind of gel-y; but when it dries, it takes on more of a creamy look. It may take more than two coats for full opacity though, because it can apply a bit streaky. Also, this stuff will stain your skin!


The SEPHORA by OPI display at my local Sephora had set aside various pinks and reds for Valentine's Day and I was really drawn to this one. Oddly enough, the website describes Casanova Is So Into Me as "sheer metallic smoky amethyst," when clearly... Well, it's not that. I'm not very good at describing colours but there's nothing metallic or amethyst-y about this shade. Personally, I would call it a dusky rose. It appears much brighter on the photo than it does in real life. It's kind of like, pink's sophisticated, well-travelled auntie. The cool one that she rants to when her mother's being impossible... I don't even know if that makes sense.

I love how creamy and muted this shade is. Seeing as it's pink, it's obvious that it's still very feminine, but in a more mature way, I guess.

That's a lot of words to describe this shade... IT'S PRETTY! There...


Hey sister, go sister, soul sister, flow sister!

Look at me, being on trend and such. This shade is such a lovely tangerine/orange and I love! At first, I was expecting it to be more like June by Chanel... Don't ask me why. Clearly, I have sight issues. Anyway, somebody needs to dupe that ASAP, coz I'm not spending nearly $30 on nail polish!

I love how bright and punchy it is. It's definitely more gel-like in its consistency and it only takes two coats for it to turn opaque. It looks lovely with my skin now because I'm quite yellow and warm-toned, but this shade would look absolutely, drop-dead-gorgeous on somebody with really tanned or dark skin. Don't you think? Ugh, so pretty <3.


What shade are you sporting on your nails right now?


February 10, 2012

Practice Makes Perfect (And A Spending Ban?)...


Greetings, lovelies! You know what Friday means -> WEEKEND! What's everybody's plans? Mine is to relax and do some much-needed writing. I know, I'm wild!

Anyway, if you read Wednesday's post, you'll know that I've been in desperate need of makeup application practice. Sure, I'm pretty good at applying my own, but that's because I know my face quite well (and so I should). But I want to be able to make everyone's face look as good as I want it to, so that means I need to get more practice working on faces other than my own.

So first up is my lovely and talented friend Missy! I've known this girl since we were kids- well... I believe I was 16 and she was 15. Anyway, she's the one who designed my banner and she's also a crazy-talented dancer/choreographer/designer/singer, etc!


I'm quite happy with this look, actually! I was originally thinking of doing something very natural and "bridal" with her, but I soon changed my mind when I looked at my palette. And I'll be the first to admit, I'm not very interested in creating natural looks. I like dramatic, I like colours, I like bold! So of course, I went with that :p. Hope you guys like this look! I know I do :).

Anyway, since my goal is to improve, I thought I'd list out all the things I could've done better:

  • Colour matching - I've said it before, I'll say it again. I don't have a very good eye for colour matching. I don't have a lot of foundations in my kit so mixing is definitely something I need to do. I tested MUFE HD Foundation in 120 on Missy's jaw and blended it down to her neck and it looked like a very close match, so I decided to just use the one shade. However, as I got closer to finishing the look, it looked too pale. I warmed her up a bit with some bronzer, but I really would've preferred an exact colour match. Has this happened to anyone else? Where you test a foundation shade and it looks exact but the colour seems to change once you've put it on?
  • Eyeshadow placement - I need to remember that not everybody has a lot of lid space like me. When I first applied eyeshadow on Missy, I took it too far up, which left me very little room to blend. So I had to clean off some product off the top and blend it some more. Her right eye ended up looking much better, though.
  • Fixing messes - Missy's left eye teared up a bit after I curled her lashes*, which messed up the eyeshadow a bit. I wiped any wetness away, but the eyeshadow wouldn't stick to the lid afterwards. I tried a few times, but it just wouldn't apply properly. Finally, I cleaned it off (again) with eye makeup remover, patted it dry with a cotton pad, and then applied some HD powder on the area. The eyeshadow applied much better after that, but it still wasn't as perfect as I would like.
  • Curling lashes* - Because I suck at it! >.<
  • Concealing - I really want to be able to achieve a completely flawless face. I definitely still need work on mixing the right concealer shade.
  • Lining - I lined (someone else's) eyes for the first time today! So I definitely could use more work, but I have to say I did a pretty decent job for a first timer. My tightlining went much better than my "regular lining," though; and that, I did not expect :p.
Oh, and one last thing I've learned: I either need a) make friends with photographers or b) get better camera equipment, because I want nice photographs of my work...

*Runs to check VISA bill*

Making friends with photographers it is! 

No seriously, I know I'm not a pro, but my camera absolutely did not do her base justice. I didn't have good lighting and my camera really isn't that great. I promise, her foundation looked much more even than what you see on the photo! >.<


In other news...


I've decided to go on a SPENDING BAN! (dun-dun-duuuunnnn)

With my makeup kit + my laptop + buying various other things which shall remain nameless (until I review them >.<), I have really been spending way too much. So I decided that I shall join the ranks of TracyLarie, Liz, Monica & Makeup Morsels... And I shall be successfuuuuul!

At first I was a bit worried that I'd have nothing to write about; but I figured if I spread out my reviews over a longer period and do more makeup looks, I should be fine. I haven't yet decided if I want to finish the ban at the end of May or the end of June. I'm leaning towards June because my birthday is in April, which means I'll be giving myself a respite from the Spending Ban, but only by using gift cards/birthday money. Think I can do it? I hope so!


Wish me luck!


February 8, 2012

Making Up Is Hard To Do: History Of Makeup & Skin Analysis


It's been four weeks since I started classes for Makeup Artistry and I've been having such an amazing time!

Last time, I wrote about my struggle with the Seasonal aspect of Colour Theory, but I think I've gotten the hang of it. I also aced my test! Which isn't saying much, actually, since it was probably the easiest test known to mankind :p. We were supposed to have another test last night, but it was postponed to next week for some reason.


History of Makeup

We had a rather fun assignment on the History of Makeup, actually. We were all to pick an era to write about and I chose the 1950's. As I wrote in my "paper," I absolutely adore the understated glamour that is 1950's makeup. The strong brows, the winged liner, the statement lip; so simple, yet so elegant. I think it's probably my favourite look.

I also love the dresses! I was in a performing arts company that did a Hairspray number a few years ago and I enjoyed twirling my dress around way too much. If I could wear dresses like that every day, I totally would...


History of Makeup was actually quite interesting and I would've happily spend another class learning about it. It was a pleasure to read and hear about trends from decades past and even what lengths women would go to to achieve a certain look. I'm not going to go into detail because that will be the topic of my next article (which will be posted tomorrow *ahem*), but it was definitely fascinating!

But back to the 50's... Can I just say that researching photos for this assignment has been way too much fun? I cannot get over how beautiful the stars of that decade were! Seriously, Elizabeth Taylor and Audrey Hepburn had absolutely perfect faces!


Skin Analysis


We touched briefly on skin analysis during last week's class. It's simple enough, really; at least on paper, it is. I'm sure I will become more knowledgeable with experience, but the thought of using my own products on a client kind of worries me. So many people have reactions to so many ingredients nowadays. I guess I'm just a bit scared of using something that will cause a reaction or cause the makeup to not perform as well as it needs to.

Ahh, well! If there's one thing this series of posts will tell you about me it's that I worry about pretty much anything :p.

I've also successfully colour matched and applied foundation on two of my classmates so far. Our makeup kit only comes with 5 foundations: 3 Face & Body's (definitely not my favourite) and 2 HD Foundations, so I'm constantly having to mix them up to get the right shade. 

The first classmate I did base on is 18 years old and has the skin to prove it. The only issue she has is a few dry patches here and there and dark under eye circles. I can't say I concealed them well enough, but my instructor says I did =/. Did I mention our classroom has rather harsh, fluorescent lighting? Definitely don't like this. Apparently it casts a green hue... That can't be good for applying makeup, can it?

Last night, I was able to apply foundation on another classmate, as well as contour and blush. She also has rather nice skin but the texture was a bit rougher and she has some redness on the cheeks and the forehead. Again, I don't think I was able to conceal the redness as well as I would like (I have a feeling mastering the art of concealing will be a struggle for me). It was rather hard for me to see how products looked on her right away because she would get all flushed, which would change the colours a bit. But once her skin calmed down, it would look better. 

Still, I'm pretty proud of myself so far! I've booked "appointments" with two of my friends this week because I want to get more practice in applying makeup on different skin tones and skin textures. It's times like these I wish I lived close to my fellow Lipstick Bandits... I'd love to have a go at their gorgeous faces!


<Tangent>


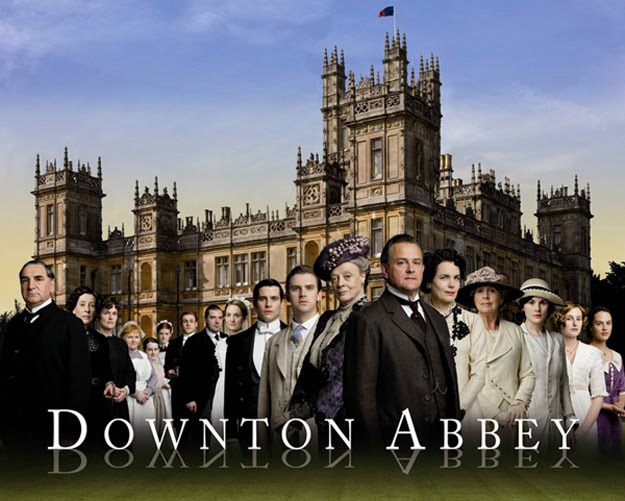
Have any of you watched Downton Abbey? I absolutely love this series! After watching (and re-watching) the second season of Sherlock, I needed another British Television fix. 

This show is basically about the Crawley's (an aristocratic family who live in North Yorkshire) and their plethora of servants. The acting is superb and you really find yourself rooting for certain people and wishing for the demise of certain others (*cough* O'Brien and Thomas *cough*). Though I must say, Carson, Mrs. Hughes, Mr. Bates and Anna have a special place in my heart :). 

Anyway, you guys simply must watch this show! If not for the acting and plot, do it for the costumes:


Aren't they divine? 

</Tangent>


What's your favourite era for makeup looks?


February 3, 2012

We Interrupt Your Regular Programming...

With photos of some home office/work spaces that I'm currently drooling over...


(photos from little bits of lovely)


(photos from House to Home)


Yeah... I'd be much more productive in spaces like these...


Happy weekend, lovelies!


LinkWithin

Related Posts with Thumbnails